
Over the time if you notice, the web is becoming more beautiful and pleasant. People have actually become more serious about UX, UI, Typography and the related technologies. One of the important steps towards this is using pretty fonts. There are many ways to use custom fonts on your website but one of the easiest one of the lot is Google Web Fonts also known as Google Fonts.
Using Google Web Fonts on any web site is really very easy.
What are the benefits or advantages of using Google Web Fonts?
Using Google Web Fonts have the following benefits:
- You do not need to know JavaScript or flash to use them like in case of Cufon Fonts or SIFR.
- You do not need to worry about font licences.
- You do not need to bother about converting the fonts into different formats.
- Google Web Fonts provides different types of effects that are really easy to use.
- You do not need to take the pain of uploading the fonts on your server.
- Your page would be comparatively faster.
- You would save some bandwidth.
- You would definitely save some time 🙂
So let’s take a look at how to include Google web fonts on your website.
How to embed or include Google Fonts on your website ?
As I mentioned above, using Google Web fonts on your site is a very easy task.
Step 1.
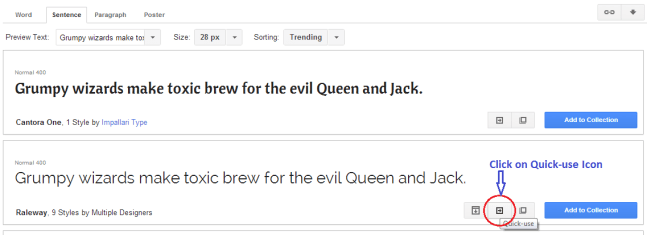
Visit https://fonts.google.com/ and surf through the different fonts available and when you have decided on the font to be used click on the “Quick-use” icon as shown in the following figure.
Step 2.
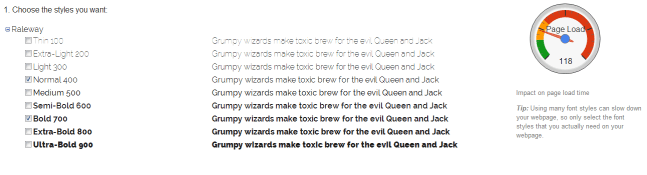
Once you click on the “Quick-use” button, you’ll be taken to a screen where you can choose all the variants of the font that you would like to use. Select the variants you need. Please note that using too many font variants can slow down your page so use only the ones you require.
Step 3.
Once you have chosen the variants you require, scroll down on the page or look for the HTML <link> tag that would have got generated automatically and contains the “href” to the css file that your fonts are defined in. It looks similar to the following :
<link href='http://fonts.googleapis.com/css?family=Raleway:400,700' rel='stylesheet' type='text/css'>
Now include the link tag on your page in the head section. Preferably above the <script> tags to ensure a smooth loading on IE.
Step 4.
Now define your CSS class and set the font-family to the name of the font passed in the query string of the CSS path specified in the link tag’s href attribute. Or simply, You can also see the font-family name to be used under the “Integrate the fonts into your CSS” section of the same page where you got the link to the css file. For example, for the CSS file mentioned in the example under step 3, the font-family value would be
p{
  font-family: 'Raleway', sans-serif; /*sans-serif being the fallback font*/
}

/*To use a different variant of the font just set the font-weight value*/

a{
 font-family: 'Raleway', sans-serif;
 font-weight:700;
}

/*You can also use CSS properties like text-shadow etc */

h1{
 font-family:'Raleway', sans-serif;
 font-weight:700;
 text-shadow: 4px 4px 4px #aaa;
}
You can also use a lot of effect on these fonts by passing an additional parameter in the query string as “effect=shadow-multiple“
For example :
<link href='http://fonts.googleapis.com/css?family=Raleway:400,700&effect=shadow-multiple' rel='stylesheet' type='text/css'>You can read more about applying effects on Google Web Fonts at https://developers.google.com/fonts/docs/getting_started#Effects
Hope you found it easy to use Google fonts on your site. Share your experiences or thoughts in the comments section below.